Clickable Choices in GMS2 Using Chatterbox and Scribble
Hello! It’s been a while again, huh? I’ve been busy … but the lovely Scribe of Days has kindly commissioned this tutorial, so I was able to make time to do it! (Did you know I take tutorial commissions? Get in touch on Discord or Ko-fi if you’re intereted!)
Today we’re covering using the mouse and [region] tags to create clickable options with Chatterbox and Scribble!
What You’ll Need
GameMaker Studio LTS (2022.0.2.49) or later. It might work on earlier versions, that’s just what I’m using.
Optional but recommended:
Also, this is a sequel to the previous Chatterbox tutorial I made, so it won’t make much sense without using that first.
First off, I’m going to be using the Input commands instead of the default GameMaker ones for this. Input is a comprehensive, plug-and-play cross-platform input system for GameMaker. Basically, it lets you define verbs like “interact” or “shoot” or “open menu”, and then you can set (or let the player set) what buttons trigger those verbs, plus it auto-detects pretty much any controller you throw at it. Implementing Input in your own project is pretty easy, but I’m also not going to go over it here. Fortunately there is a Newbie Guide as part of the (very robust) Input documentation! Let’s hear it for community guides! If you don’t want to use Input, though, it should be relatively simple to find the corresponding GameMaker functions.
As for Scribble, I’m specifically using 8.7.1 since I’m on GameMaker LTS, but it should be the same in 9.0.
Phew. Let’s open up our tutorial file again!
First, I’m going to do a little Input-based housekeeping. I’m going to be using the default Input config file (that’s __input_config_verbs), but adding the following lines to the keyboard and mouse section:
choice1: input_binding_key(ord("1")),
choice2: input_binding_key(ord(“2”)),
choice3: input_binding_key(ord("3")),
For this tutorial I’m going to limit us to using three choices, but if you want more, just follow that pattern. I’m also going to change the “accept” verb to “interact”, and bind it to two different inputs:
interact: [input_binding_key(vk_space), input_binding_mouse_button(mb_left)],This is a personal design choice — I like being able to use both space and mouse left to advance dialogue, and it simplifies controller setups. Experiment and see what you like best! As for Scribble, I’m happy with the default config for now.
We’re going to be working in our oText object. I’m also going to Input-ify our old Step code, like so …

Much better. This works exactly the same as the old code, but now you can also click to advance dialogue. But what if you want to click on a choice to select it, instead of using the number keys? Well…there are a couple of ways to do that. We’re going to do the easiest way — the one that’s already built in for us with Scribble. Sound good? Let’s go!
The first thing I’m going to do is actually make a new Script, called refresh_text_elements, where we’re going to keep all of our text-drawing-related stuff. This is for two reasons: it’s neater, and Scribble uses a cache as part of its text-drawing magic, so we need to refresh that cache when we make changes to the Chatterbox (for example, when we advance the dialogue or make a choice.) Some of this code was originally designed for me by Juju Adams, so credit where it’s due!
function refresh_text_elements(){
//Add all the code in between these braces!
}
We start by defining some values. The empty array will hold all our bits of text, and we’re going to draw it at (100,100). I’m also including a padding value, which is just “how much space to put between the main text and the choices”. Setting these things at the start makes it way easier if you need to change them on the fly later.
text_elements = [];
 var _x = 100;
 var _y = 100;

 var _padding = 30;
Next, we’re going to look through every line in the current Chatterbox and get them ready with a repeat(). Remember, the Chatterbox holds everything from the current node, not just the line we’re currently displaying (that’s current_text).
var _i = 0;
 repeat(ChatterboxGetContentCount(chatterbox))
  {
   //Get the content strings from the chatterbox
   var _content = chatterbox.content[_i];
   var _line_text = _content;

   oText.current_text = _line_text;

   var _element = scribble(_line_text).blend(c_white);

   //How fast we want the text to type in.
   var _typist = scribble_typist().in(3,5);

   array_push(text_elements,[_x,_y,_element,_typist]);

    //Move down a bit to make each content string look like a paragraph
   _y += _element.get_height() + _padding;
   ++_i;

  }
I won’t get into the full details of Scribble, but this _element turns our plain string into a Scribble, which holds all kinds of useful information and can be transformed in all sorts of ways. Right now I just want it to be coloured white, since our background is black, so that’s what .blend does.
I’m also including a typist, which lets Scribble type letters out one by one. This is really useful for Future Things, but right now it mostly looks cool. You don’t have to include it if you don’t want to.
Now push it all to the text_elements array and repeat until the whole Chatterbox is Scribble-ified!
Now, we come to a crossroads. Obviously, if we have options we want to draw those, but what do we do if there’s no options — if our Chatterbox is Waiting? You’ll usually want some kind of prompt to indicate that the player can interact to move forward, or they’ll just stare at the screen waiting for something to happen. In this instance, I’m going to add the text (continue) as a prompt and push that to the end of the array.
if (ChatterboxIsWaiting(chatterbox))
   {

    //If we're in a waiting state (no options) then we should prompt the user to continue
    _x += 1;

    _y += _padding;

    var _element = scribble("(continue)").blend(c_white);
    var _typist = scribble_typist().in(8,5);

    array_push(text_elements,[_x,_y,_element,_typist]);

    }
Quick note — I’m setting the typist’s speed here to 8, which is the max, so it displays the (continue) text almost-instantly. Personal preference!
Alright, now let’s get to the real meat. We’re going to do the following:
- Grab all the Options out of Chatterbox
- Prepend an option number (optional, but since we have the number-button system I think it’s useful. You could do an arrow, a little image, whatever you like.)
- Push it to the array
- Add padding
- Repeat for as many options as there are.
In code, that turns out to be:
else {
    #region Here is where option text is generated
    _number = ChatterboxGetOptionCount(chatterbox);
    var _i = 0;
    repeat(_number) {
    var _string = string( _i+1) + ": " + ChatterboxGetOption(chatterbox, _i);
    var _element = scribble(_string);
    var _typist = scribble_typist().in(8,5);
    array_push(text_elements,[_x,_y,_element,_typist]);
    //Move down a bit to visually separate each option
    if (_number >= 2) {
    _y = _y + _padding;
    } else {
    //if there's only one we shouldn't need to do anything here.
    }
      ++_i;
    }
    #endregion
So your full refresh_text_elements code should currently look something like this:
function refresh_text_elements(){
  text_elements = [];
  var _x = 100;
  var _y = 100;
  var _padding = 30;
  var _i = 0;

  repeat(ChatterboxGetContentCount(chatterbox))
    {
    //Get the content strings from the chatterbox
    var _content = chatterbox.content[_i];
    var _line_text = _content;
    oText.current_text = _line_text;
    var _element = scribble(_line_text).blend(c_white);
    //How fast we want the text to type in.
    var _typist = scribble_typist().in(3,5);
    array_push(text_elements,[_x,_y,_element,_typist]);
    //Move down a bit to make each content string look like a paragraph
    _y += _element.get_height() + _padding;
    ++_i;
  }

  if (ChatterboxIsWaiting(chatterbox))
  {
    //If we're in a waiting state (no options) then we should prompt the user to continue
    _x += 1;
    _y += _padding;
    var _element = scribble("(continue)").blend(c_white);
    var _typist = scribble_typist().in(8,5);
    array_push(text_elements,[_x,_y,_element,_typist]);
  } else {
    #region Here is where option text is generated
    _number = ChatterboxGetOptionCount(chatterbox);
    var _i = 0;
    repeat(_number) {
    var _string = string( _i+1) + ": " + ChatterboxGetOption(chatterbox, _i);
    var _element = scribble(_string);
    var _typist = scribble_typist().in(8,5);
    array_push(text_elements,[_x,_y,_element,_typist]);
    //Move down a bit to visually separate each option
    if (_number >= 2) {
    _y = _y + _padding;
    } else {
    //if there's only one we shouldn't need to do anything here.
    }
      ++_i;
    }
    #endregion
   }
}
Now, head over to the Draw event of oText. Instead of the “if Chatterbox has options…” block we had, we’re going to summon our Scribbles.
 var _i = 0;
  repeat(array_length(text_elements))
    {
        //Get our text element and position
        var _array = text_elements[_i];
        var _x       = _array[0];
        var _y       = _array[1];
        var _element = _array[2];
        var _typist  = _array[3];


        //Draw the text element
        _element.draw(_x, _y, _typist);

        //Break out of the loop if this text element hasn't finished fading in
        if (_typist.get_state() < 1.0) break;

        ++_i;
    }
This will draw our text using the settings we defined in refresh_text_elements. The “break” line will make sure it draws the dialogue text first, then any options or the Continue prompt. With me so far?
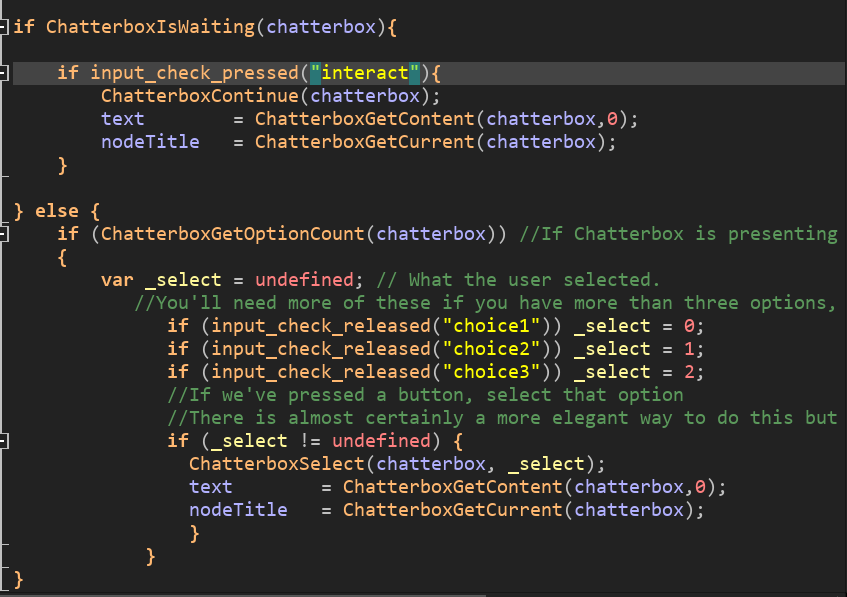
Okay! A few little bits to tidy up before we run. Remember last tutorial, every time we called or changed the Chatterbox, we had these lines?
text = ChatterboxGetContent(chatterbox,0);
nodeTitle = ChatterboxGetCurrent(chatterbox);
refresh_text_elements() is going to do that for us, so we need to replace every instance of them with that. By my count, there should be three — one in create_text(), and two in the Step event of oText. While you’re there, go to the Create event of oText (currently empty) and add this line:
current_text = undefined;Phew! That’s a lot of fiddly changes, so if you get something weird when you try to run, read over carefully and make sure you’ve got refresh_text_elements() where it needs to be. The problem I run into the most often is the typist looping one line over and over, which means it can’t find what to print next. You should end up with something that looks like this:

Alright, that was a lot of work, but it’s going to be worth it. Now, we want to be able to click on those options in order to choose them, right? There’s a couple of ways you can do this, but I said I was going to give you the bare minimum effort one, and that’s what we’re going to do. We’re going to do that by using a Scribble function called “region”. Using it, we can define parts of our text as, well, “regions” — basically, hyperlinks.
Watch closely, now … I’m going to go back to refresh_text_elements, where we’re generating our choices, and I’m going to change this line:
var _string = string(_i+1)+”:”+ChatterboxGetOption(chatterbox, _i)to this:
var thisNumber = string( _i+1);
var _string = “[region,choice” + thisNumber + “]” + thisNumber + “: “ + ChatterboxGetOption(chatterbox, _i) + “[/region]”;
Meaning that all our choices are now enclosed in region tags — “choice1”, “choice2” and so on. Scribble tags, in square brackets, don’t get printed in the actual text, so we can add dynamic, silent formatting really easily.
Now, head back to oText. In the Create function, add this line:
hovering = -1;“hovering” will be a variable meaning “what the mouse is currently hovering over”. -1 means “nothing”. We use -1 instead of 0, because 0 usually corresponds actual value, e.g. the start of an array.
Next, we’re going back to the Draw function. At the very top, add this line:
activeRegion = 0;Then, in the repeat(array_length(text_elements)) loop, after _element.draw and before the break(), add the magic spell:
var thisRegion = _element.region_detect(_x,_y,input_mouse_x(),input_mouse_y());

if thisRegion != undefined {
  _element.region_set_active(thisRegion,c_yellow,1);
  activeRegion +=1;
  hovering = thisRegion;
} else {
  _element.region_set_active(undefined,c_yellow,1);
}
In plain terms: “If the mouse is currently touching a choice/region, set that choice/region to “active” and set the variable “hovering” to the name of that choice/region. Otherwise, set no choice/region to be active.” Because of the way the loop works, we also need “activeRegion” to let us know that “at least one” choice/region is active, otherwise it’ll only detect the most recent one it’s drawn.
Then, directly after that loop, add this:
if activeRegion <= 0 {
  //If there were no active regions this frame, set hovering to -1;
  hovering = -1;
}
If we don’t do this, then the regions stay active even after we move the mouse off of them — no bueno!
If you run your code now, your regions should light up yellow (or whatever colour you want to change c_yellow to) when you hover over them. But clicking on them isn’t going to do anything yet. For that we’re heading back to Step. The lines starting input_check_released are going to get added to, so I’ll just give you the full new versions to copy and paste in:
if (input_check_released("choice1")) or (input_check_pressed("interact") and hovering = "choice1") _select = 0;
if (input_check_released("choice2")) or (input_check_pressed("interact") and hovering = "choice2") _select = 1;
if (input_check_released("choice3")) or (input_check_pressed("interact") and hovering = "choice3") _select = 2;
Here, if Input detects one of the Interact inputs (currently a mouse click or the space bar) while one of our choice/regions is active, it will treat that the same as if we’d pressed one of the number buttons. Behold!

…Ah, hm. One sec. Back in refresh_text_elements, let’s make an adjustment …
var _element = scribble(“[region,continue](continue)[/region]”).blend(c_white);Now if we run again …

There, that’s much better. You’ll note I’ve cheated — you can click anywhere to advance text if there’s no choice to be made, so we don’t strictly need to do this — but it feels better if it lights up when you hover over it, don’t you think?
And that’s how you do it! Hopefully you’ve followed all that, but if you haven’t, this time I’m going to be uploading the project file for this tutorial so you can grab the final code all in one go.
If you don’t want to just use the text region — say, if you want to use a whole sprite, like this — there are ways and means … but that’s another tutorial ;)
Credits: Juju and everyone who worked on Scribble and Chatterbox; Alynne and the Input team; everyone who’s used the last two tutorials(!!); the amazing Scribe of Days for commissioning this!
Follow the studio at @spiderlilygames on Twitter for updates on Schrodinger’s Catgirl, and more tutorials! … Hopefully sooner than two years from now!
P.S. If you liked this tutorial and found it useful, you could always buy me a Ko-fi! Between freelancing and game dev I don’t have a lot of free time, but I really love making tutorials, so your contributions, no matter how small, let me take the time to write these up. If you want to commission a full tutorial, get in touch!